Creating an Azure Web App running on Python and writing to SQL database based on Service Bus messages
This tutorial is based on this Microsoft learning website https://learn.microsoft.com/en-us/azure/azure-sql/database/azure-sql-python-quickstart
There are few different steps that I did as I followed along on the tutorial link above and I will highlight them for you.
Note
What I created here is not something that would likely get used in a real life scenario. The web app which hosts the Swagger API is an example of how API’s are built and exposed using the /docs part of the url. This is solely to give us ideas of how we could develop this or use this in our upcoming projects
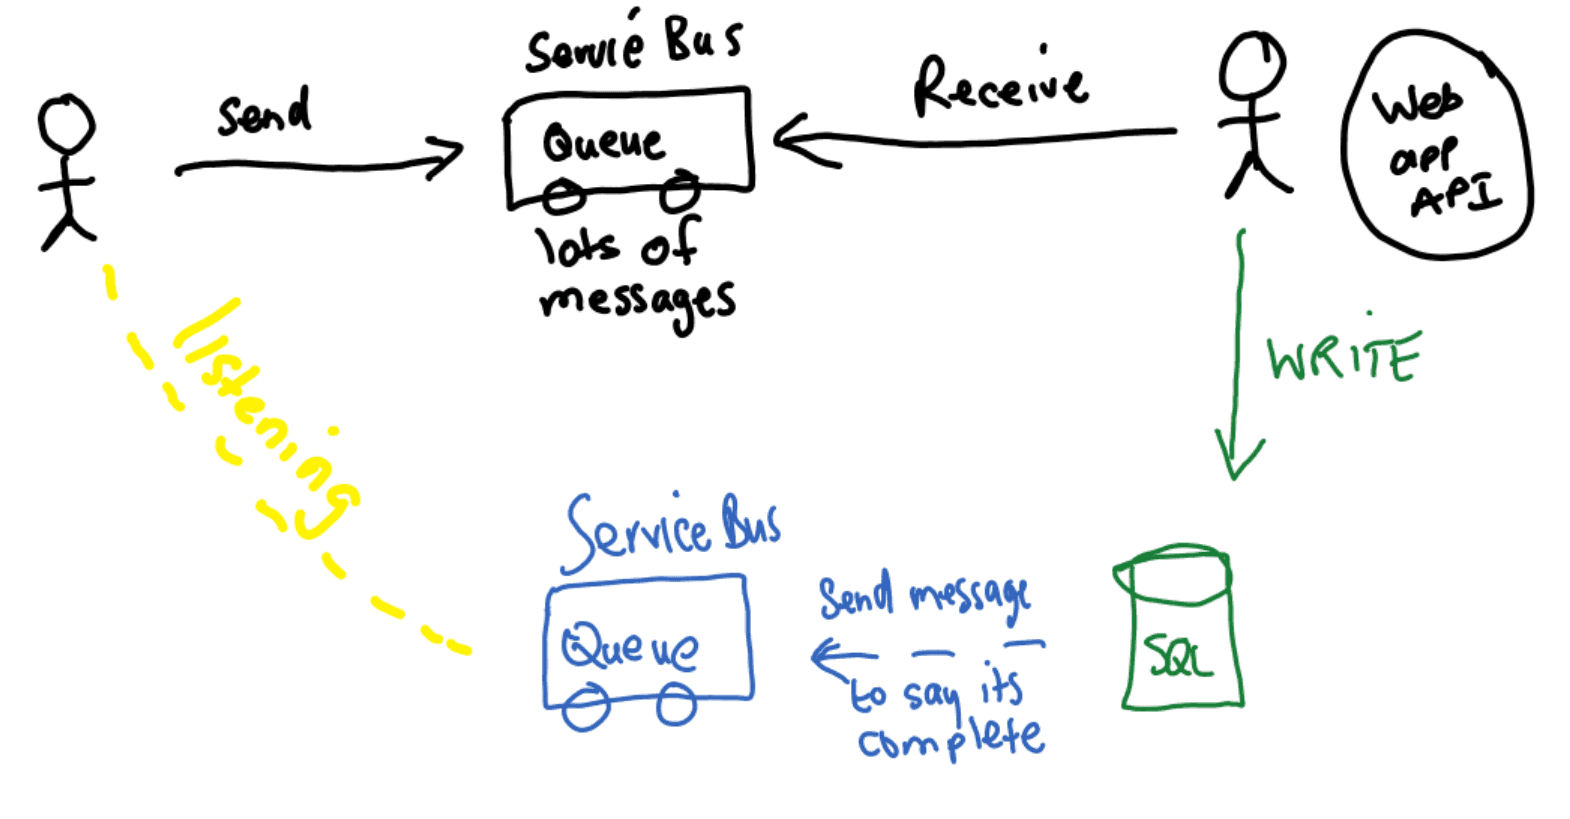
This is a rough diagram of what I built. But note that I did not code for the sending of messages after I completed writing to the SQL database (blue and yellow part of diagram).
Steps
Set up a Python environment (locally)
Create a virtual environment. I actually did create a Python environment, but realised I already had one! dooah!
If you are like me and you are working in Tech and you have your local environment already set up with Anaconda or if you have an existing Python environment then go ahead and use it.
But then again if your environment is old and using Python 2.x or whatever, you may want to consider having an updated environment.
Install the required libraries
I created the requirements.txt file and put the following in
    pyodbc
    fastapi
    uvicorn[standard]
    pydantic
    azure-identity
    azure-servicebus
I saved this file in a new folder on my local laptop machine called python-sql-and-servicebus on my c drive. You can run this in your python terminal in VS code like this
pip install -r requirements.txt
but make sure your terminal is in the right folder you created above.
Create or select an existing Azure SQL database
I have an Azure SQL server and it is set up to allow other Azure services to connect to it and the only security is that it is firewall IP protected and is publicly accessible. Not great for production situations. I want to do an update to this and use User assigned managed identity, but that is for another day.
Establish the variable in your python environment by running this in the terminal, but first I had to install the ODBC driver on my laptop.
(The connection below uses Microsoft Entra ID to authenticate, look for the window that prompts you for credentials.)
$env:AZURE_SQL_CONNECTIONSTRING="Driver={ODBC Driver 18 for SQL Server};Server=tcp:<sqlservername>.database.windows.net,1433;Database=<databasename>;Encrypt=yes;TrustServerCertificate=no;Connection Timeout=30"Create the app code that builds the API and has the write to SQL logic
I wont get into all the code as it is quite long, you can check out my GitHub page here for the full example.
https://github.com/clintgrove/python-sql-api-and-servicebus
Change all the variables and parameters to match the names of your Azure Resources. Once you have it all installed in a file called app.py like you can see in this screenshot then you will run
uvicorn app:app --reload

This will give you http://127.0.0.1:8000, click on this and your web app will spin up locally on a browser tab.
Send a whole lot of random service bus messages
In my example I created this other py file named ‘serviceBusSender.py’ so that I can blast a service bus with many messages, and then my “app” will then process all these thousands of messages at one time and write them to SQL database table.
Fire off the API by going to the url and adding /docs
Once you are in the Swagger API page, then go to the relevant api, which in my case is a POST and can be seen in my code @app.post("/personservicebus/")
The swagger API will have a list of the GET’s and POST’s. You can click on the “Try” button to fire off the API call.
Complete the steps from the Microsoft Learn page to create a Web App online
Until now you would have been working locally (on your laptop or desktop and using the localhost). To get the Web App deployed to Azure so that you are not just working locally, follow the steps in the URL I linked at the top of this article.
Make sure to set it all up as instructed and you can see how you can connect to a SQL database using passwordless technology. Really cool.
Thanks for reading! Clint